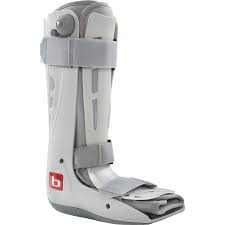
The Bledsoe Genesis Walker boot, inspired by athletic shoe technology. The walker provides a biomechanical natural walk allowing you to recover with minimal disruption to your daily life.
You do not have to compromise your life on the pathway to recovery. Not all boot walkers are created equal, some won’t provide you with needed protection and comfort.
The genesis walker revolutionises patient comfort, manoeuvrability, and control.
Comfort of the Breg air walker boot
The genesis is the lightest full shell walker on the market while still providing strength where it is needed with dynamic air stride technology. The dynamic air chamber actively absorbs the shock during heel strike.
The extra low heel height of the genesis boot walker is comparable to a standard shoe. Consistent heel height reduces pelvic tilt lessening heel and back pain.
Narrow heel width as compared to other walkers lowers the force placed on the knee reducing secondary pain.
Manoeuvrability of the Breg air walker boot
Athletic shoe thread designs provide traction on different surfaces permitting better cross directional movement. Bledsoe engineered the thread design of the genesis by studying the components of the natural gait. The thread helps to simulate the action of a healthy ankle and leads to more natural walking.
Control of the Breg air walker boot
The built-in air pump allows incremental changes of pressure in the dual air chambers providing compression to the foot and ankle. The hard shell design combines the control of cast with the convenience of a walker.
Bledsoe Genesis Walker fitting instructions
The Genesis Walker provides the control you need to heal. it has been engineered for your comfort and maneuverability allowing you to continue with your daily life.
Here are the 12 easy steps to fit the Genesis Walker
step 1 loosen all the straps start the fitting process by loosening all the straps on the boot there are two located on the calf section and one on the top of the foot.
step 2 remove the anterior shell. Remove the plastic interior shell. open the velcro closures on the foam boot.
step 3 open the foam boot. open the foam boot so it is easy to insert the foot and calf inside
step 4 place foot into foam boot. place the patient’s foot into the foam boot so the patient’s heel sits securely against the back of the boot shell, make sure the foot is flat on the inner sole
Step 5 fit the foot cuff. starting with the foot section of the foam boot fit the boot by overlapping the cuff. one side has a hook closure that will attach to the opposite cuff.
step 6 fit the calf cuff. fit the calf cuff by pulling the hook section of the cuff over the pile section and securing.
step 7 attach anterior shell. attach the plastic anterior shell with the velcro spots on the back. align the top parallel with the top of the foam boot
step 8 secure foot strap. secure the strap on the top of the foot section. insert the strap end through the black d-ring and pull to the desired tension on the strap
step 9 secure bottom calf strap. secure the bottom calf strap and pull to desired fit
step 10 secure top calf strap. secure the top calf strap and pull to desired fit
step 11 push air pump to inflate. push the built-in air pump to inflate the air bladder to the desired patient comfort and support level the fitting process is complete
step 12 push valve to deflate. in order to deflate the air bladders press firmly on the release valve until air has been released.
Enjoy the comfort, maneuverability and control that the genesis offers and continue your daily life with the Genesis Walker.
Genesis walker boot cleaning, How to clean a genesis walker boot in four easy steps
The benefit of the genesis walker boot over the cast is that is can be removed. If your doctor allows you to take off your walker boot then you may want to wash the liner sometimes to keep it fresh and clean.
The best way to go about the genesis walker boot cleaning or to figure out how to clean the genesis walker boot is to
Step #1 first remove the liner from the frame.
Step #2 Wash liner in warm water with a mild detergent. The liner is not suitable for washing machine or dryers as it may damage the air bladders.
Step #3 Clean boot shell with a damp cloth.
Step #4 Allow the liner and the boot shell to air dry completely.
Note: Replace liner in the frame of the boot only when both the frames and the liners are totally dry.
You may get this boot walker on Amazon.