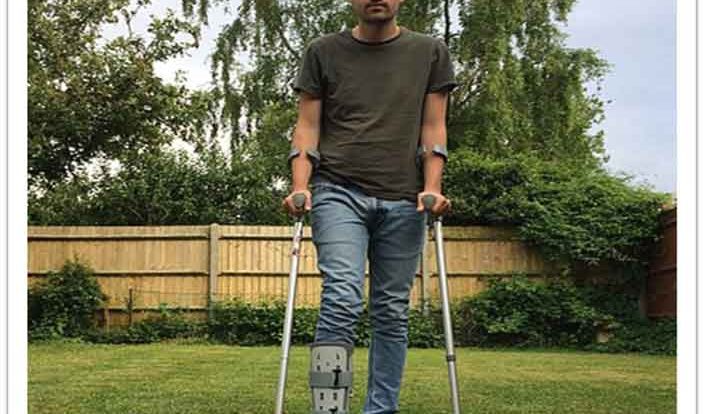
Walking boot discomfort is sometimes expected because of all the changes that you encounter in a small space of time. This article will give you some simple strategies that you can implement today that will give you an immediate benefit. You will be better able to take care of yourself and enjoy as many activities as possible while your bones or ligament take its time to heal. The tips and strategies will help you to better able to avoid walking boot discomfort that can easily be avoided.
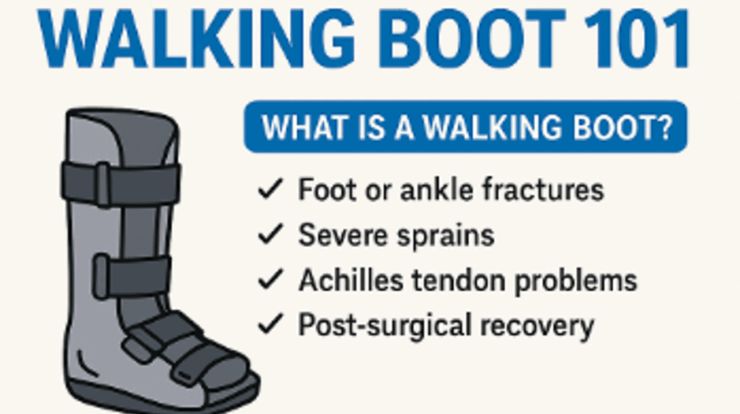
In case it is your first time and on this site and you were looking for a different type of walking boot, here is an easy synopsis of what a walking boot is? A walking boot is a medical shoe that protects your leg, ankle, and foot after an injury or surgery. The walking boot is also called by other names typically walker boot, aircast boot, and CAM boot. The official name for the walker boot is controlled ankle movement boot. This CAM boot is normally removable and adjustable to create a snug fit to help the healing process. The boots have an outer shell made of polycarbonate material and an inner liner that acts as an air bladder. The air bladder is pumped with air until snug and comfortable fit is achieved.
While the bones in your foot, ankle or leg heal it is important to restrict movement. This will aid the formation of new bone strands for bone fusion. Please see the article on how bones heal for a more in-depth analysis, it is an interesting article. On occasion, walking boot discomfort may arise from something as simple as strapping the walking boot too tight or even improper gait. Gait is the term for a proper walking stride. You should never ignore walking boot discomfort because it may be a sign of something more sinister like poor circulation, a blood cloth or other complications.
In fairness, not everyone experiences wearing a walking boot, if this is you, then here are some typical signs of walking boot discomforts that you need to look out for. They are signs that most people report and that which you need to look out for to ensure your safety. Some or easy to rectify and others may be a bit more sinister:
Fit Medical Boot Properly To Avoid Walking Boot Discomfort. Follow these simple steps:
Getting rid of walking boot discomfort start with doing the right thing, in the first place, like fitting your walking boot properly. This can be done in a number of quick steps that anyone can follow.
Step #1 Inserting the foot
Scrunch up the sock and gently unroll it on your foot. Make sure to eliminate all the creases. Creases will, later on, cause discomfort especially when you walk around on the foot in the boot for a period of time. Grab the boot, detach the velcro strap and hold them back, insert your foot in the boot until your heel is flush against the back (of the walking boot).
Step #2 Threading the velcro straps
Thread the first Velcro strap, starting with the ones closest to the toes through the middle of the plastic threading bar on the other side of the boot. Then pull the strap over the bar and back to the other side. You should pull the strap tight enough to restrict foot and ankle movement but not too tight to restrict circulation. It should be tighter at the toes and less tight as you go up. Remember that your health care professional will tell you exactly how to tighten yours for your special situation.
Step #3 Practise Walking in your walking boot
Everything seems right, you insert your foot properly, you fasten the velcro straps properly, now it is time for you to get up from your seat and walk. Assume that you were seated all this time, try getting up from the seated position slowly. You want to make sure that the boot is comfortable. If you are able to get up try to practise walking in your boot, making sure that you are experiencing comfort. Well as much comfort as possible.
Step #4 Walking technique
Remember that your foot, ankle or leg may still be injured therefore it is important that you follow proper walking techniques. While walking in your stride try rolling your foot from the heel to toes. This will lessen the impact of walking on your legs, most ortho boots are rounded to help your foot to roll better. You may look on examples of these on walker boots on Amazon.
Learn Proper Gaiting Techniques While Non-weight Bearing To Avoid Walking Boot Discomfort:
Walking improperly will cause some sort of pain. It is therefore important that you learn proper techniques from the beginning. If you are non-weight bearing your doctor will tell you that you should not put any weight or pressure on your injured leg.
This simply means that you cannot walk around on your leg or broken foot. Will you, therefore, have to stay in and watch friends box set? Even though this would be nice, you have options. You can use the lovely knee scooters, many of which are available on Amazon for a really good price. Here is a link that you can use to view some images.
The knee scooter can be a bit clunky sometimes, in those moments the iWalk 2.0 is an excellent alternative. The iWalkie gives you the freedom to move around freely. It may take a bit of getting used to but it is truly amazing. Imagine walking around without a crutch cramping your style and limiting your movement or a scooter that does not give you the benefit of going hands-free.
Have a look at the iWalkie products here. Follow your doctor’s instructions concerning the amount of weight, if any, that you can place on the injured foot. Your doctor will also advise you on how soon to resume your normal activities after the injury.
Learn Proper Gaiting Techniques While Weight-bearing To Avoid Walking Boot Discomfort:
Weight beating means that you can put some sort of pressure on your foot. This happened in the final stages of your bone recover or when you transition from a cast to a boot. You can probable weight bear when you develop a sprain. A sprain can have a number of levels of severity from stained ligaments to torn ligaments. Depending on the severity you may be asked to put different amounts of pressure on the leg, ankle or foot. Note: You can either be full weight-bearing or partial weight-bearing.
Full weight-bearing
Full weight-bearing means that you can put your full body weight on your broken foot. Full weight-bearing is good but it comes with its own set of problems like knee, hips and lower back pain caused by the joints on both legs not aligning up properly.
The boot being hight than the shoe on the other foot causes the problem. The easy fix is to get an EVENup boot. The Evenup allows you to increase your height on the none injured leg so that both legs are on the same height.
No crutch! With full weight-bearing, you do not necessarily have to walk with crutches. Crutches cause your underarm to be sore. Especially if your walk is not perfect. If you have to wear crutches then you can purchase crutch covers. These covers will make your love affair with the crutches more pleasant.
Partial weight-bearing
Partial weight-bearing means that you are allowed to put a certain amount of pressure on your injured leg. You will walk using crutches as a walking aid. There are a number of options for crutches. If you get it for free, that would be amazing.
Alternatively, is the Hugo Mobility 721-790 Hugo Lightweight Adjustable Aluminum Crutches, you can get on Amazon.This one is good if you are under five feet two but there are others if you are much taller.
Levels Of Weight-bearing
Non-Weight Bearing – With this, you are not allowed to put your body weight on the injured leg. You are not even allowed to put your injured leg on the floor to balance up yourself. In other words, keep your injured foot off the floor.
Feather Weight Bearing – you are able to lightly touch the floor with your toes just to occasionally gain some balance. Even though you are allowed to touch the floor, you really do not want to get carried away and put too much pressure on the ground using your injured leg.
Partial Weight Bearing – you are able to put more of your body weight on your injured leg. In most cases, you can place up to half of your body weight on the injured leg.
Weight-Bearing as Tolerated – you are able to put most of your body weight on your leg. You are allowed to put as much pressure as you can tolerate.
Full Weight Bearing – you are able to put your full body weight on your leg. In other words, you can walk without the use of a crutch.
Learn How to Use Crutches properly
Learning to use crutches properly will surely help to reduce excessive pain in the shoulder. Even though you can use crutches cushion to relive some of the pain. A number of people use crutch pads, like the Crutcheze Essentials Underarm Crutch Pad to provide some cushion and comfort. This is how you do crutches properly:
Step #1 Adjust the crutches
Adjust the crutches to just under to underarm. You do not want it too high or too low. The height can be adjusted by releasing the screw on the legs, then when you attain the correct height and then tighten the screws to keep it in place. If you are like me sometimes and need some support, you can ask your healthcare professional to help you with this process.
Step #2 Walking with crutches
Place the crutches a foot or a foot and a half in front of you. Before you start walking, while standing, make sure that you put most of your body weight on the good leg.
Then, transfer your weight from the leg to your arms and swing your body through the crutches as the crutches take up your weight from the arms.
Move your healthy leg and place it slightly in front of the crutches while maintaining stability and transfer your weight back to the leg
Move the crutches forward and repeat the movement
Step #3 Important Tips for using crutches:
The best way to avoid shoulder pain, avoid supporting your body weight on your armpits but instead use the handgrips.
Add crutch pillows at the top of the crutches to help relieve soreness under your armpits.
When using one crutch, use it on the hand that is on the opposite side of the injured leg. Lots of people get this wrong and use the crutch in the hand next to the bad leg.
Don’t do it this way and it does not offer much support to the leg and put too much pressure on the arm.
Ensure the hand grips and the bottom tips of the crutches have enough padding.
Note: Problems with using a crutch and how to avoid them
The main problem with using crutches is sore arm. Most people put pressure under their underarm. The easiest solution is to not put pressure on your underarm but instead on the handgrip.
You may experience some muscle discomfort but they are natural because you are using a different set of muscles. This will get overtime.
Walking on crutches is like doing abs exercise is like you are swinging your lower body forward each time you move forward. It is understandable why you keep getting really tired. The main solution here is to get some rest when you are tired. Your ab muscle will develop over time to where you get as tired.
Dealing With Problems Early To Avoid Walking Boot Discomfort:
Walking boot problems can inhibit your recovery process and increase the chance or a speedy recovery caused by the constant aggravation of the injury.
Simple things, improperly inflating your walking boot, not getting enough rest, the improper care of the boot, or poor walking technique can cause problems.
It is therefore important that if you are experiencing any problems to speak to your health care professional. They are awesome and will help you to recover speedily. You want to speak to them sooner than later because problems like blood clot can occur or other serious complications.
Here are some common problems to look out for: abnormal swelling or redness, calf pain, thigh pain, groin pain or aching back
Common Complaints And What To Do About It? Walking boot discomfort:
Poor body alignment and excessive swelling of the legs are the most common complaint with people who wear walking boots.
Wear A Evenup Boot To Fix Alingment problem
Discomfort can be caused by improper alignment of the body because one foot is higher than the other. A simple solution is to wear an EVENup boot, they are available on Amazon for a reasonable price.
Get The Rest That The Doctor Ordered And Use The RICE Technique To Reduce Swelling And Discomfort
Your leg is inured and the doctor’s advice is, most times, to get some rest. Adequate rest will help you to prevent or reduce swelling that is a normal part of the recovery process because of the damage in the foot. Your doctor will tell you about the RICE method.
R is for rest. Rest your ankle by not walking on it too much. If you do have to walk, try using crutches, if necessary. Assuming that you were given permission to weight bear.
I is for ice. Ice the leg to keep down the swelling. Never put ice directly on the skin but instead use a thin piece of cloth or maybe a pillowcase between the ice bag and the skin. Try not to ice the leg for more than 20 minutes per session. Just as a precaution to avoid frostbite.
C is for compress. Compression can help restrict the movement of the injury and helps to control the swelling and support your injury.
E is for elevation – when in a resting mode raise your injured leg to above the level of your heart. You can do this easily by using a leg elevation pillow. There are quite a few that are recommended online. For example the foam elevation pillow.
Final thoughts on Avoiding Walking Boot Discomfort
Avoid walking boot discomfort is not easy. However, if you follow the instructions given by your team of healthcare professional you will go a far way in reducing all, well most discomforts.
You can share in the comments section the strategies you use to reduce or eliminate walking boot discomforts.


I am another person that needs to use the boot walker. I figured that when the boot gets on the feet you do not have much threat of injuries, nonetheless, when it comes off there is an opportunity for a serious injury. I figured out that if I want to avoid injuries then I have to keep the walking boot on. The walking boot has many discomforts. I like how you analyse a few of these discomforts. Thanks for sharing the information.